Key takeaways
- Budget tightly under $300 and want zero maintenance: Choose the 70mm refractor type (AstroMaster 70AZ). Accept fainter deep-sky views for reliability.
- Want to find objects on the first night without learning star-hopping: Choose StarSense Explorer DX 130AZ. You trade phone dependency for confidence.
- Want the brightest views and have garage/patio space, observing 2+ times per month: Choose the 6-inch Dobsonian (Sky-Watcher Classic 150P). It gives the lowest cost per millimeter of aperture.
- Tight apartment or balcony, or observing with children under 12: Choose a 114mm tabletop (StarBlast). Lightest, shortest setup, table-height eyepiece.
- Light pollution (inner city) and interest in planets + automated tracking: Choose a GoTo Maksutov like NexStar 4SE, and budget for an external power pack.
What's inside
The best telescopes for beginners in 2026 are the Celestron StarSense Explorer DX 130AZ for assisted finding with a smartphone, the Sky-Watcher Classic 150P Dobsonian for maximum aperture per dollar, and the Celestron AstroMaster 70AZ for ultra-simple setup under $300 — the right choice depends on whether you prioritize easy object location, bright deep-sky views, or quick backyard assembly.
As an Amazon Associate we earn from qualifying purchases at no extra cost to you.


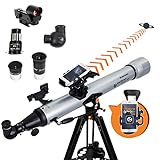

Beginner Telescope Comparison at a Glance
For backyard viewing, aperture (light-gathering diameter), mount stability, and setup time matter more than magnification claims. A larger aperture shows fainter objects, but it also adds weight and bulk. This table compares common beginner models that remain widely available in 2026:
| Telescope | Aperture | Focal Length / Ratio | Mount Type | Assembled Weight | Typical Setup Time | Best For |
|---|---|---|---|---|---|---|
| Celestron AstroMaster 70AZ | 70mm refractor | 900mm / f/12.8 | Alt-azimuth with tripod | 8.2 kg (18 lbs) | 10-15 minutes | Moon, planets, bright star clusters on a budget |
| Orion StarBlast 4.5 Astro Reflector | 114mm reflector | 450mm / f/4.0 | Tabletop alt-azimuth | 6.3 kg (13.9 lbs) | 5-10 minutes, no tripod | Kids, small patios, grab-and-go use |
| Celestron StarSense Explorer DX 130AZ | 130mm reflector | 650mm / f/5.0 | Alt-azimuth with tripod + phone dock | 8.1 kg (17.8 lbs) | 15-20 minutes + app alignment | Beginners who struggle to find objects manually |
| Sky-Watcher Classic 150P Dobsonian (6-inch) | 150mm reflector | 1200mm / f/8.0 | Dobsonian alt-azimuth base | 18.5 kg (40.7 lbs) total, 11.5 kg tube + 7 kg base | 15-20 minutes, no tools | Deep-sky (nebulae, galaxies) from suburban yards |
| Celestron NexStar 4SE | 102mm Maksutov-Cassegrain | 1325mm / f/13 | Motorized alt-azimuth GoTo | 10.5 kg (23.1 lbs) | 20-25 minutes + sky alignment | Automated tracking in light-polluted areas |
General market ranges in 2026: 70mm refractors $180-$280, 114-130mm tabletop and tripod reflectors $250-$500, 6-inch Dobsonians $400-$600, and entry GoTo Maksutovs $500-$800. Avoid any beginner telescope advertising 500x or 600x magnification — usable magnification is limited by aperture and atmospheric conditions, usually 140x to 300x for these models.
How to Match Aperture, Mount, and Setup to Beginners
1. Aperture: How Much Light You Need in the Backyard
Aperture determines brightness and detail. A 70mm refractor collects enough light for sharp lunar craters, Saturn’s rings, Jupiter’s four Galilean moons, and the Pleiades. A 114mm to 130mm reflector roughly doubles the light-gathering area, which makes the Andromeda Galaxy, Orion Nebula, and dozens of globular clusters visible from a typical suburban yard. A 150mm Dobsonian collects about 4.5 times more light than a 70mm refractor, which is why it resolves fainter nebulae and shows star clusters as individual points rather than haze.
Trade-off: Larger aperture needs darker skies to shine and requires collimation (mirror alignment). Refractors under 90mm need no collimation and cool down instantly, while 114mm+ reflectors need 20-30 minutes to reach ambient temperature for crisp views.
2. Mount Type: What Keeps the View Steady
Alt-azimuth tripod (AstroMaster, StarSense Explorer): Moves up-down, left-right like a camera tripod. Most intuitive for beginners. Light tripods vibrate — look for steel legs with a accessory tray that braces the legs.
Tabletop Dobsonian base (StarBlast): A simple wooden or particle-board box that sits on a table or sturdy platform. Extremely stable and smooth, but you need a table, garden stool, or crate to reach comfortable height.
Full Dobsonian base (Sky-Watcher 150P): The most stable option per dollar. The base rotates on Teflon bearings and damps vibrations far better than a lightweight tripod. Bulk is the downside — the base does not collapse.
Motorized GoTo (NexStar 4SE): After a 2-star or 3-star alignment, motors find and track objects automatically. Great if light pollution makes star-hopping hard, but adds setup steps, requires 8x AA batteries or external power, and you still need to learn the alignment procedure.
3. Setup Difficulty: From Box to First Light
For true easy assembly, count parts and tools. A tabletop reflector like the StarBlast arrives with the tube already on the mount — you just attach the finder and eyepieces. A tripod refractor requires leg extension, tray attachment, tube ring mounting, and finder alignment (10-15 minutes the first time). A Dobsonian ships in two boxes (tube + base) and needs 6-8 screws for the base, then the tube drops in. GoTo models add electronic alignment: centering two or three bright stars in the eyepiece through the hand controller, which takes practice on the first night.
Best Picks by Situation
Easiest Overall for Complete Beginners: Celestron StarSense Explorer DX 130AZ
This 130mm reflector solves the biggest beginner frustration: finding things. The phone dock uses the StarSense app to plate-solve the sky and guide you with arrows to your target after a simple daytime alignment. You still learn the sky, but you are not stuck hunting for hours. The f/5 optics are wide-field enough for nebulae and give 100x-150x comfortably for planets with the included 25mm and 10mm eyepieces. Weight is manageable for one person to carry in two trips.
Limitation: Requires a compatible smartphone and a charged battery. Not ideal if you want a fully analog experience.
Best Value for Deep-Sky Backyard Viewing: Sky-Watcher Classic 150P Dobsonian
If you have storage space and can carry about 18 kg to the yard, a 6-inch Dobsonian shows the most. The 1200mm focal length gives higher contrast on planets and resolves globular clusters like M13 into individual stars, even from Bortle 5-6 suburban skies. The Dobsonian mount is the most durable and has almost nothing to wear out. No batteries, no apps, no tripod wobble.
Limitation: Tall tube (about 115 cm) and a wide base need garage or closet space and a car with back-seat room if you travel to darker skies.
Simplest and Lightest for Kids and Small Spaces: Orion StarBlast 4.5 Astro Reflector
The 114mm short-tube tabletop reflector is ready in minutes and sits securely on a patio table. Its f/4 design gives wide 2-degree fields for sweeping the Milky Way, and the closed base is intuitive for children to nudge along. Total weight under 7 kg means one trip outside.
Limitation: Short focal length limits high-power planetary detail, and you must provide a stable table. Collimation is needed more often on fast f/4 mirrors.
Lowest Maintenance Option: Celestron AstroMaster 70AZ
A 70mm refractor has sealed optics, no mirror alignment, and no cool-down time. It excels on the Moon and planets and doubles as a daytime terrestrial scope. Setup is straightforward with a pre-assembled tripod and erect-image diagonal. Good choice if you observe occasionally and want to avoid maintenance.
Limitation: 70mm aperture dims deep-sky objects; you will see the Orion Nebula as a faint glow rather than detailed structure.
Hands-Free Tracking on a Budget: Celestron NexStar 4SE
The 102mm Maksutov-Cassegrain with GoTo finds nearly 40,000 objects automatically and tracks them so they stay in the eyepiece without manual nudging — useful at 150x+ on planets from light-polluted yards. The compact tube is easy to store despite the longer focal length.
Limitation: Narrow 0.8-degree field of view makes locating objects manually hard if alignment fails, and the motorized mount is heavier and more power-dependent than manual mounts.
Decision Matrix: Which Should You Choose?
Use your budget, space, and patience for tech as filters:
- Budget tightly under $300 and want zero maintenance: Choose the 70mm refractor type (AstroMaster 70AZ). Accept fainter deep-sky views for reliability.
- Want to find objects on the first night without learning star-hopping: Choose StarSense Explorer DX 130AZ. You trade phone dependency for confidence.
- Want the brightest views and have garage/patio space, observing 2+ times per month: Choose the 6-inch Dobsonian (Sky-Watcher Classic 150P). It gives the lowest cost per millimeter of aperture.
- Tight apartment or balcony, or observing with children under 12: Choose a 114mm tabletop (StarBlast). Lightest, shortest setup, table-height eyepiece.
- Light pollution (inner city) and interest in planets + automated tracking: Choose a GoTo Maksutov like NexStar 4SE, and budget for an external power pack.
Setup, Maintenance, and Durability Realities
Step-by-Step First Night Setup (Applies to Most Manual Reflectors)
1. Assemble in daylight. Extend tripod legs or build Dobsonian base, then balance the tube. Tighten all knobs firmly — loose mounts cause drift.
2. Install finder scope. During the day, point at a distant chimney or tree and center it in the low-power 25mm eyepiece, then adjust the finder until the same object is centered in the finder. This saves 30 minutes of night frustration.
3. Let reflectors acclimate. Set the tube outside 20-30 minutes before observing so the mirror reaches outside temperature; otherwise stars look like bloated triangles.
4. Start with the 25mm eyepiece (lowest power, widest field). Find the Moon or a bright star first, focus slowly, then swap to higher power. Never start with the smallest eyepiece.
5. If using StarSense or GoTo, complete phone alignment or 2-star alignment before it gets fully dark — alignment stars are easier to identify in twilight.
What Wears First and How to Avoid Common Mistakes
Mount and tripod wobble is the first failure point on budget tripod models. Do not extend the thin lower leg sections fully, hang no weight from the center, and keep the accessory tray installed — it triangulates the legs. Finder misalignment and lost collimation cause most “I can’t see anything” complaints. Check collimation monthly on reflectors with a simple collimation cap; refractors and Maksutovs rarely need it.
Cleaning: Mirrors and lenses have delicate coatings. Do not wipe dust dry. Use a bulb blower first, then only if needed, rinse with distilled water and let air dry. Fingerprints on eyepieces are common with beginners — clean with lens tissue and a drop of lens cleaner, wiping in a circular motion from the center.
Consumables: Budget for two additional eyepieces over time (a 32mm wide-field and a 6-9mm planetary) and a red flashlight to preserve night vision. GoTo users will need a 12V power pack; AA batteries drain in 2-3 hours in winter cold.
Worked example — cost per use: A $480 Dobsonian used twice a month for three years costs $480 / (24 x 3) = $6.67 per session, plus about $60 for extra eyepieces. A $220 refractor used the same amount is $3.06 per session. If you observe less than once a month, the lower upfront cost often makes more financial sense than the larger aperture.
Frequently Asked Questions
How much should a beginner telescope magnify?
Ignore maximum magnification on the box. Useful magnification is limited by aperture and atmosphere. A practical rule is 25x to 50x per inch of aperture. For a 130mm (5.1-inch) telescope, that is about 127x-255x, but most nights detail is sharpest at 80x-150x due to heat shimmer and light pollution.
Can I see galaxies and nebulae from my backyard?
Yes, but expectations matter. From suburban skies, galaxies appear as faint gray ovals and nebulae as dim clouds, not color photos. A 150mm aperture makes the Orion Nebula, Andromeda Galaxy, and double cluster clearly visible. Darker skies, not more magnification, make the biggest improvement. Allow 20 minutes for your eyes to dark adapt and avoid white phone light.
Do I need to collimate a beginner telescope?
Only reflectors need regular collimation. Refractors and Maksutov-Cassegrains hold alignment for years. For 114mm to 150mm reflectors, a quick check with a collimation cap before each session keeps stars tight. The process takes 5 minutes once you learn it and does not require removing the mirror.